
Shoes
I had left off with my shoes looking something like this:

Next step was to cut the toes to form a better interface. In addition I wanted them to look sort of like wingtips and so captured those curved elements. I made my template by placing blue tape on the shoe and marking where the middle, end points of the curves and depth they should come to. I pulled the tape, attached it to a piece of light cardboard, sketched out my curves and cut it out. I then used this template to trace the curves onto pieces of blue tape that I then stuck back down to the shoe.


Once my templates were in place, I put a shoe stretcher in the toes and cut following the outline using an X-Acto blade. I personally love to use X-Acto blades for damn near everything, but you must adhere to the one rule of changing your blades often, otherwise it will just torture you.

From here I cleaned up the interior of the high heel toes, removing the lining materials so I could get the best seal possible between the two sections. This basically entailed carefully peeling the canvas liner from the leather and cutting it off where necessary.

I am still getting used to the idea that I should be photographing everything I do and so have some missing images for this next bit and have an absence of images in relation to the template section; my apologies for that. Now that I had the toes in the right form, it was time for glue prep. First I took blue tape and created an outline of where the toe was going to attach, making sure to error on the side of covering too much, as it's main purpose is to protect the main shoe. I then sanded the toe and sole of the main shoe with 80 grit sandpaper, taking it down to raw leather. I gave the same treatment to the toe of the high heel, making sure to really rough up the rubber that was going to be glued to the sole. Once everything was sanded I hit it with a bit of acetone to create a better gluing surface.

The adhesive I choose to use for this was Barge Glue, which is a contact cement with an emphasize on making sure whatever you're gluing isn't going to come apart. I did some testing with it on some un-prepped pieces of scrap from cutting the toes and tried to pull it apart after 5 minutes of contact. Ultimately I tested it to failure by borrowing my sister and having both of us pull on it. Moral of the story: it's really strong. In addition, as it dries, Barge draws down, pulling surfaces closer together and forming a tighter seal, something that was kind of important to me seeing as how my foot could be very wet if I didn't have a waterproof seam. In use the glue is like any other contact adhesive; spread on both pieces, let dry 15 minutes and then stick them together.

Once I had the toes on, I decided it would be a good idea to "clamp" it in some way as it dried, so I grabbed some rubber bands and whatever was handy to put pressure where I needed it.

At the end of the day I had something like this:

I had some issues when it came time to put the toes on due to the glue instantly wanting to stick, meaning that some things aren't as well aligned as I would like. However, when you look down at them from six feet, they look pretty good. I still need to do some stitching, especially on the sides and resole them, but that will have to be done at some later date.
Mask
Although my drawings had featured a skull mask, I wasn't 100% committed to the idea, which is why I went ahead and bought a budget anatomical skull off Amazon, making it so I couldn't back out. Right from the get go I knew one of my major problems was going to be that the skull was going to almost exactly the same size as my head sans skin and so would be needing some serious sanding, as well as, reshaping.
Once I got the skull out of the box I cut it in half.

I then took advantage of the fact that the skull could be seperated into top and bottom halves, working at first solely with the bottom portion. After drilling a pilot hole directly behind the nose, I cut out where it connected to the spine, creating the basis of the pocket where my face would fit. What followed was a great deal of dremel sanding using 60 grit sandpaper, thinning out all the walls of the skull, carving out the eye sockets and hollowing out the roof of the mouth. After several hours, I had a skull with two open eye sockets which I could not really put on.
Using a heat gun I heated up sections of the skull and reformed them to accommodate my face. This was a fairly long process as it was all a great deal of guess and check, as well as, the reshaping could point out where more material had to be taken off and so was interspersed with sanding. When that process was done I had this:


There was then a great deal of sanding and heating done on the top half so that it fit my head.

Once I had both halves approaching done with the rough sanding work, I hit the inside with some 80 grit followed by some 220 to make it be less like rubbing my face on a sanding block. At this point it's looking even better than I had been expecting.


As you can clearly see, there is some serious filling needed for the joint between top and bottom. What isn't quite so obvious in these picture is the fact that the original skull was actually fairly poorly assembled; there are a whole host of gaps between pieces and mold lines that I need to make disappear. However, all in all, I am immensely pleased with how it came out.
Odds and Ends
Before I start into the backpack I need to backtrack to some of the inspiration for this costume. I stumbled across a number of images of embalming kits by accident while searching for Victorian medical instruments.
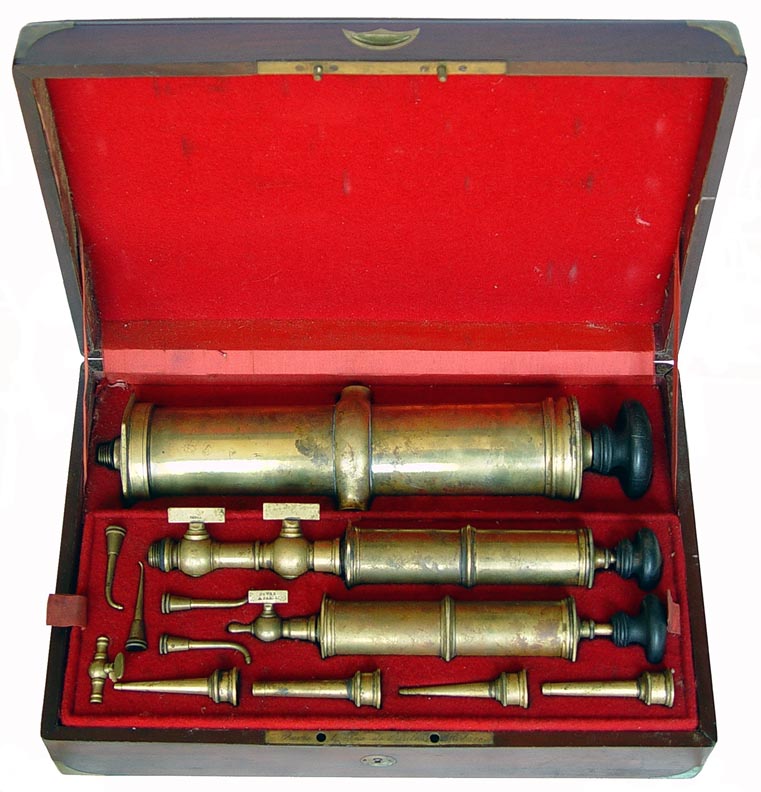
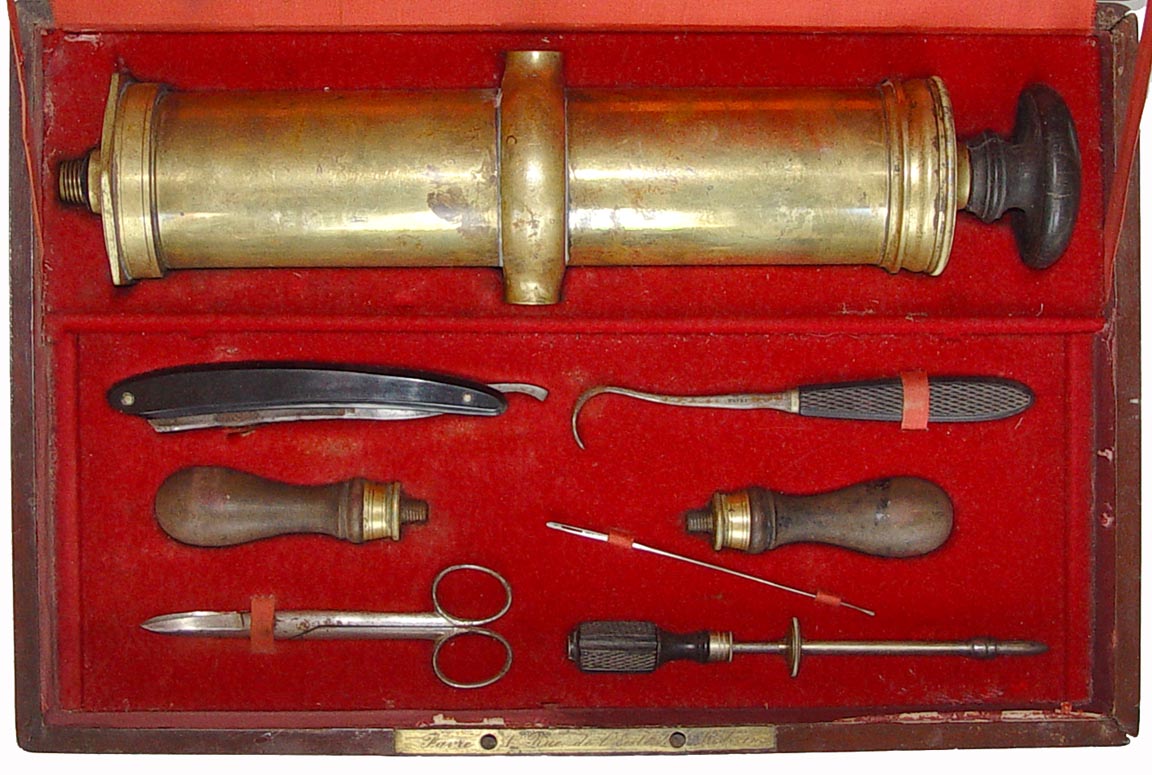
With my outfit, I wanted to have some of these elements, of the over-sized needles, of pumps and plunges to pull out body fluids and replace them with formaldehyde, without hindering me or my clothing in any major way. I discarded the ideas of a doctor's bag or using internal pockets on the basis of convenience and settled on doing a backpack. After looking at what some other individuals have done and photos of some of the original steam engines I did a rough sketch.

Collecting materials actually turned out to be pretty easy thanks to the second hand store and Lowes.
A seltzer bottle for the tank.

A 4 inch PVC T for the "boiler" and a 2 inch street 22.5 degree elbow joint with a 2 inch joiner for a smoke stack.

All of which look something like this when laid out:

A stop by the second hand store yesterday made these appear, as well as, a brass tap handle I forgot to photograph:

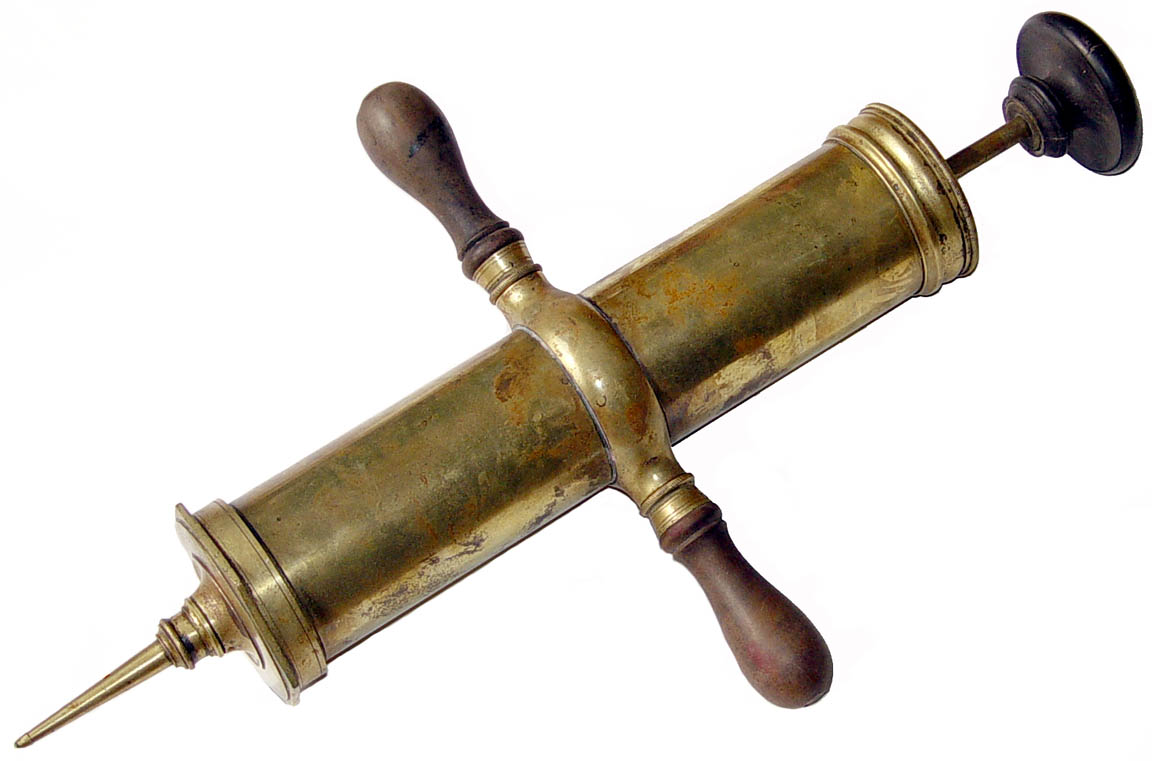
While I was there I also got this old keg pump:

Which happens to look like possibly the scariest needle since the Little Sister's once you take the attachment piece off.

Obviously it's early days on the backpack and I still have a number of things to work out (such as, how am I going to attach the needle to the backpack). Once I return from vacation the bulk of it should come together pretty fast.
I know this post was really long, my thanks to those who read all the way through it.


